Showing posts with label Passat B6. Show all posts

Saturday, 15 February 2014

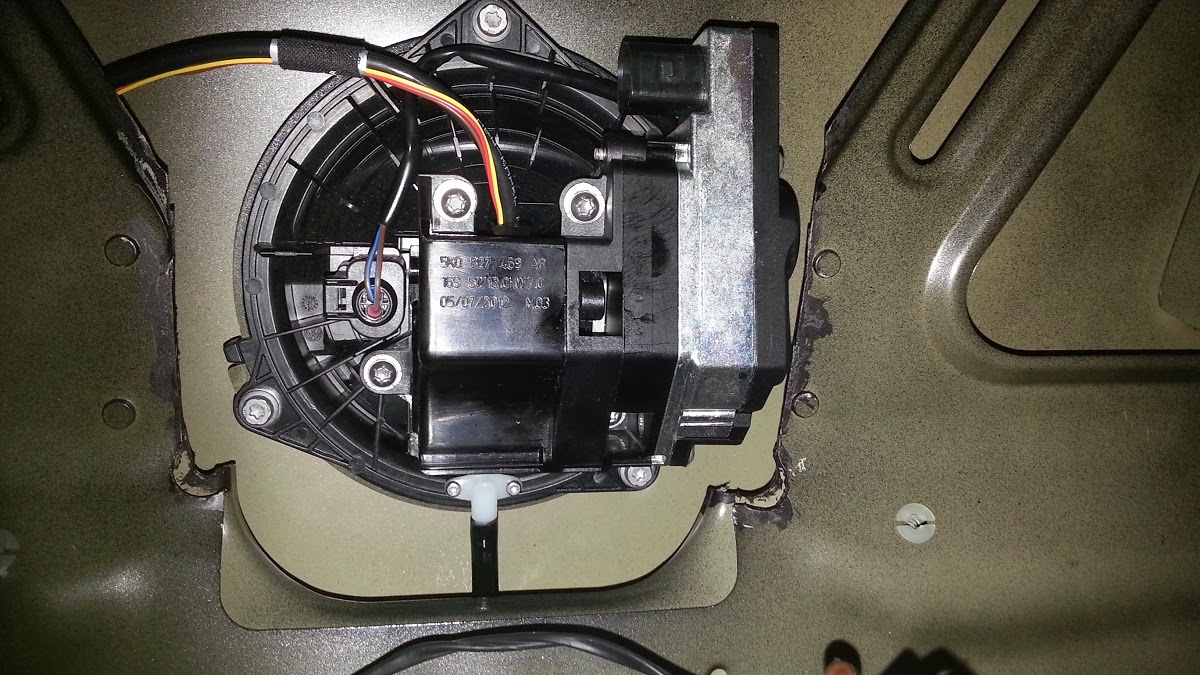
Volkswagen Emblem Camera on Passat B6 3C

Fitting the VW emblem camera on the Passat B6 3C 2009 model. 

Visit my main listing here 

The Passat B6 rear lid cover was not design for the new VW emblem camera. 

Similar to the Golf 5 fitment, we had to remove excessive material which was blocking the camera. 


Saturday, 4 January 2014

Twin Rear Fog Lights on Passat B6

4 Jan 2014 : Missing The Rear Foggies 

Visit my main listing here 

I admit....I miss them very much. The B6 twin reverse lights were nice for a change but everytime I look at my light switch, I see the RearFog light emblem crying to me....

"make me work, pleassseeeee ...I am family ! "

So, I worked on them with these dual Reverse and Fog bulbs which are specially modified for the Jetta Mark 5 dual reverse rear lights.  Have to modify the housing of the light holder to accept the presence of the protruding wire on the bulb.....

The Red SMD LED bulbs are in triple set-up per bulb. Oh yes, they are very very bright ! Blinding actually...


I can see that alot of detailed work in placed into each bulb. Worth the money spent ! 

Here is how it looks when the lights are work in the various stages


Note : The foggies are so bright, I have to reduce the lights exposure of the camera to minimum ! 

Thursday, 28 November 2013

Passat B6 Double Reverse Lights LED !

28 November 2013 : Enhancing Reverse Lights

Visit my main listing here

Having fitted the dual ring LED lights, the rear visibility of the vehicle have been greatly improved.  As such, the necessity for the Rear Fog lights would not be necessary.....in my opinion. 

Fitted the LHD inner right rear lights which have the reverse bulb fitted.  There is now two reverse bulbs instead of the usual one on the left side. The right side fog light is deleted. The LED brake/signal light ring is retrofitted onto the LHD light assembly.

Night time visibility or dimly lighted car park lots is no longer an issue during reversing manoeuvres.

 The inner left rear lights : RHD with Fog and LHD with Reverse Light

Dual Reverse Lights on the Passat B6 in LED format
  

Monday, 30 September 2013

Inner Brake and Signal Lights for Passat B6

Visit my main listing here

30 Sept 2013 : SMD LED Brake/Signal Ring Installation

This is a video of the vehicle before and after modification....


Youtube Source : Passat Additional Lights ( HD quality )

Close Up Video of the Lights : Passat Rear Lights 

In order to enhance the rear visibility of the Passat B6, dual brake and signal lights would be added onto the inner lights mounted on the boot lid.  

These SMD LED dual colour rings are designed for the Passat B6/Jetta 5/Golf 5 Valeo tail lights.

Removed the inner lights of the Passat B6 and dismantled the lens to get to the inner reflector assembly 


Drilled out the blanks and finish hole diameter at 6mm


Install the SMDLED rings over the reflector housing.  Modification is needed to get the ring to fit properly. 

The ring would fit nicely over the housing.

Assembly of the housing back into the light assembly

The ring is designed to fit exactly into the original housing


Testing : Brake Light

Testing : Signal Light 

Reattached the lens back to the housing and seal it with clear polymer sealant. To do final install tomorrow. 

Saturday, 28 September 2013

Analogue Clock on 3C Passat

Visit Main Listing Here 

9 October 2013 : Fitting the original dashboard trims....job completed 


28 Sept 2013 : Retrofitting B7 Analogue Clock on 3C Passat B6

Being from the Old School upbringing, I am very familiar with the clock face and hands.....i.e. the old fashion analogue clock

When the B7 Passat first came out with the central mounted analogue clock, I am determined to make it mine ! 

After upgrading to the new 7N0 gateway, 3AA Central Convenience Module, it is now possible for me to have the clock.  It is mounted as part of the Central Electric II and Gateway.  Coding is necessary....connection is simple. 

But because, the various component have to be reposition, the changes on the various trims is necessary. Now waiting for the new dashboard trims from Germany.....both the passenger trim and cluster trims needed to be replaced.  A whopping Euro250 for the two trims ! 


The tray is removed and the hazard switch together. The Analogue Clock and a new mounting bracket. 

The hazard switch is moved from the original position to be part of the radio trim panel. New trim, new switch, new connector are required. 

The Front Passenger Airbag Reminder Light have been deleted 
        ( hidden behind since I will NEVER use it ever....)      
A new trim B7 Aircon Panel trim without the Reminder is used. 

De Clock ! 


The unwanted trims from the old design Passat B6

Monday, 9 September 2013

Passat Easy Boot Open Retrofitted on B6 Passat

Visit my main listing and customer's comment here


9 September 2013 : Easy Open Retrofit

The latest B7 Passat with Easy Open trunk option have been retrofitted on the Passat B6.  Because of the older platform on the B6, several component need to be replaced and introduced.  These includes :

1. Instrument cluster
2. Gateway 7N0 series with AA
3. Convenience Module ( this is critical as the Easy Option controlling unit )
4. Harness
5. Dual parallel sensors
6. Sensing Module

After retrofitting, the MFD would display an option to select the Easy Open for the trunk.  When selected, the driver with the appropriate KESSY key would be able to trigger the opening of the trunk simply by swiping his foot under the rear bumper.  Certain condition must be met.

The Hardware....sensor module, Convenience Module, Sensors, harness....

Fitting the sensor kit onto the B6 Bumper


Sensing Kit fitted 

The EASY OPEN option on MFD

With the new Convenience Module, the once missing Convenience Menu now appears ! 

Many option is available on the new Convenience Menu ! Super Cool ! 

The New Convenience Module for the Passat only !

With the new convenience module, the colour cluster is more enhanced. Many features that I have never seen before....now appears ! Worth the pain and suffering I went thru......

Watch these video on the new Convenience Menu and the Easy Open Option

Friday, 23 August 2013

Retrofitting the TPMS High on 2010 Passat B6

Visit my main listing and customer's comment here


23 August 2013 
The Orange TPMS have been a good device to warn driver of the tire pressure but the older model Green display seems out of place on the VW interior ( newer Orange TPMS is in Red display now....).   The need to hide or locate the display unit with the awkwardly protruding USB power jack is a pain.....in my opinion.

After a relatively long investigation, we have successfully completed an install of the TPMS High on a B6 Passat.  On this car, we need to replace the instrument cluster to a new version and also the Gateway to the latest B7 version.  The parts involved are original VW parts including the specific connectors required.....as such, the retrofit exercise's cost was much higher that that of the cost of the typical Orange TPMS.

Nevertheless, many VW customers have asked for this to be made available.  As such.....this exercise was carried out.

The TPMS High on Volkswagen cars would show the actual tire pressure reading according to the wheel position.  


A pressure sensor is mounted in each wheel behind the air valve and sends a signal to a receiver located in the rear right wheel vicinity. The signal is transmitted via radio frequency when the wheel is turning at a specific speed otherwise there is no transmission. 

The receiver receives the signal from the 4 sensors and is able to distinguish the different positions of the 4 sensors even though they are none specific.  Some other brands of TPMS have different types of sensors ( e.g. Orange TPMS ),  which must be installed in specific location before the display can be correct.  

The signal received is transmitted via LAN to the control module in the vehicle for display on the MFD. 

NOTE : The function of this TPMS would only work with older Meter Cluster model type and Gateway module.


The Kit with a specially made harness for the vehicle type


The Receiver mounted

Original VW TPMS High Sensor

Aftermarket ORANGE TPMS sensor

TPMS High display on MFD

Select Load Type for pressure limit monitoring

Option of Partial or Full load

Select specific wheel and tire size mounted

Select pressure measuring type


Friday, 2 August 2013

Boot Lid Strut Replacement on Passat B6

Visit my main listing and customer's comment here

My Passat B6 boot lid have been acting up.  When popping the lid, it would open up half way and stays there.  A manual lift by hand is necessary.  The local VW dealer was not helpful as they claim it is wear and tear. So, I have to help myself.

Found that the part number for the B6 and B7 are different.  The two cars seems identical in operation and design.  Decided to order the latest design instead of the old B6 part number.

Comparing the two, they seem identical though the B7 is slightly  shorter by a few mm.

B7 (top) vs B6 (lower) Boot Lid Struts

Replacing the struts on the Passat is no joke.....

1. Remove the boot trims on the left and right side. Lower back seat rest.....
2. Remove rear seat rest side boosters. 
3. Remove C pillar trim panels.
4. Remove rear dash panel trim ( rear parcel shelf ) 
5. Remove reel belt assembly (both left and right )
6. Insert angular tool to pry the lock clip off the struts and lift out the strut front end lock. 
7. Remove the rear end of the strut from the boot area. 
8. Assembly in reverse. 

Total time taken....2 hours being the first time doing this ! Alot of work for just two struts. 


Wednesday, 26 September 2012

My Quest for the V2 Self Park Steer System for my Passat B6


I was told by a spare part dealer in town that he has a Malaysian customer who have bought all the switches and trims for the B7 Passat so that he can convert his B6 Passat interior.  If it is true, I think he would be in for a shock......

in my quest for the V2 Self Park Steer system.....I found out the following :

To change the the Passat B6 Parking Brake Switch ( Push Push/Engage Release format ) to the new Passat B7 Parking Brake Switch ( Pull Push/Engage Release format ) ....you need the following :

1. ABS Module 3AA  ### ### AG/AJ
A new module is needed to adapt to the new design switch format....ie. Push/Push to Pull/Push. The module was a real BITCH to code !  Eventually, after a ton of emails and telephone calls, I manage to code it 95%.

2. Parking Brake Module
For the same reason of compatibility, you need to replace the electronic Parking Brake Module which is located under the central console panel.  

3. TPMS 2 module plus 4 wheel pressure sensor, harness.
Because the new 3AA module have the Tire Pressure Monitory System II built into the system, you must install the TPMS2 module and it's related sensors, harness. There would be an error code if this is not done. Installing this is another story to be told.....

4. Central Console Trim Assembly 
The entire plastic console from the ash tray area to the rear arm rest area have to be replaced because the two new B7 switch assemblies would not fit onto the B6 console.

5.Shifter Assembly B7
Because the central console is replaced, the old shifter cannot be use as it would not fit . I love my current 747 side triggering DSG shifter which is high chrome finish.  The new B7 shifter is Mat Chrome....not actually what I like............. Change is a must....the trigger would have to be modified from side triggering to the front triggering layout. A specialty of yours humbly CBX autoservices....

6. Existing Push Push Brake Switch on the Dashboard
This would be best replaced as it would become useless after the conversion to the new Park Brake Module. Rewiring to adapt to the new PBM....as it is slightly different.

7. B7 Central Switch Assemblies
Two new switches would be necessary to replace the modular switches currently used. Along with it, two new connectors and rewiring.


Total cost of the above......estimated....RM6500 + alot of sweat and tears !


At the end.....I have to give up my quest for the V2 Self Park Steer system because changing to the new 3AA ABS module is a pre-requisite but it leads to the the same door as what is described above......I have to change all that have been mentioned.  That is why my new ABS module is 95% successfully coded.  It was nevertheless....a very good learning experience.  I am poorer but wiser.......

CONCLUSION : Not a wise modification